


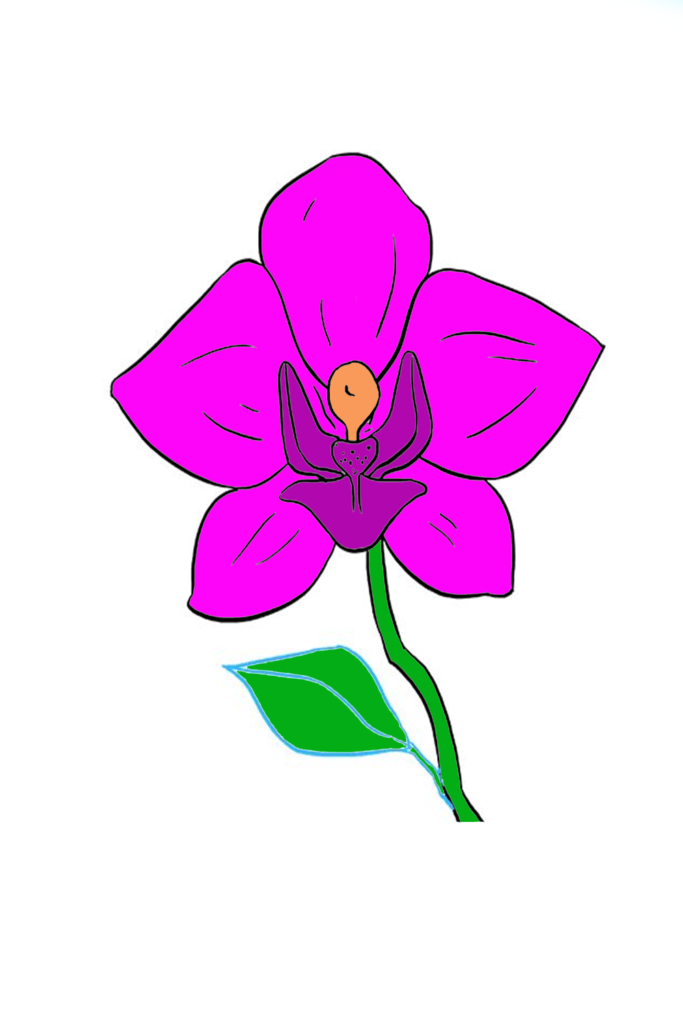
Orchid Drawing
Figure out how to draw an extraordinary-looking Orchid drawing with simple, bit-by-bit drawing directions and video instructional exercises. By following the basic advances, you can draw a wonderful Orchid without much of a stretch. Orchids are blossoming tropical plants that are viewed all through the world. There are more than 22,000 types of orchids. A few orchids are epiphytes, meaning they develop on different plants, like trees, with their underlying foundations in the air rather than underground.
Visit the Geranium Drawing tutorial on the cool drawing idea websites.
Others structure cooperative associations with growths to gobble up rotting natural matter. Two of the most notable assortments are vanilla – the cases producing the recognizable enhancing – and the houseplant Phalaenopsis. People have, for a long time, doled out imagery to orchids. In old Greece, it was trusted that if a dad ate orchid tubers – root-like pieces of the stem – his kid would be a kid. However, if a mother consumed them, she would bring a young lady.
Today, giving somebody a pink orchid represents fondness and the bloom of the fourteenth wedding commemoration. Numerous nations have taken on different orchid assortments as their public blossoms. A few orchids are eccentrically seen to look like different things. For instance, the design of the Phaleanopsisorchid, like the one in this instructional exercise, looks like the substance of a lion. Shoe orchids, additionally called woman’s shoes, are said to look like shoes.
Vanilla might be the orchid’s most noteworthy commitment. Have you at least some idea that a delightful blooming plant delivers this delicious treat? This enhancement is produced using the units, or beans, that have been relaxed in fluid or dried cases that are scratched.
Might you want to draw a tropical orchid?
This straightforward, bit-by-bit attracting guide is here to assist you with doing that, utilizing simple to adhere to directions and fundamental lines and shapes.
All you will require is a pencil, a piece of paper, and an eraser. You may utilize pastels, hued pencils, or something almost identical to conceal you’re got done with drawing.
Assuming that you enjoyed this instructional exercise, see the accompanying drawing guides: Cherry Blooms, Lotus Blossom, and Tulip.
Orchid for Youngsters – Stage 1
Start by defining two bent boundaries. The lines ought to be oppositely slanting, plummeting toward each other. This starts the blossom’s petals.
Simple Orchid Drawing – Stage 2
Keep on drawing the petals. For each, expand a bent line outward, then, at that point, twofold it back toward the blossom’s middle. Rehash on each side to shape a perfect representation.
Simple Orchid Drawing – Stage 3
Orchids have three extra petals called sepals. Draw the primary utilizing a bent line to encase the space between or more of the current petals. Then, draw two sepals beneath at that point, involving a bent line for each.
Simple Orchid Drawing – Stage 4
Then, you will draw the section or focus of the blossom. In the first place, draw a roundabout shape, leaving an opening at the base. Bend the lines descending around this opening. Underneath this, encase an unpredictable shape, leaving the base open and expanding a bunch of equal lines. Delete rules as the need might arise.
Simple Orchid Drawing – Stage 5
Then, you will draw the labellum, or lip, of the orchid. Encase a sporadic bent shape, generally three-sided, around the lower part of the section. This should fill the hole between the petals, encasing the blossom.
Simple Orchid Drawing – Stage 6
Then, you will draw the throat of the bloom. From each side of the segment, encase a bent, unpredictable shape. Rehash to shape a perfect representation on each side.
Simple Orchid Drawing – Stage 7
Add subtleties to your bloom. Surface the petals and sepals with bent lines. Define boundaries down the length of each part of the throat, and draw spots on the lower piece of the segment, called the stigmatic surface.
Add More Subtleties to Your Orchid Picture – Stage 8
Expand two bending lines descending from the bloom, framing the stem.
Complete the Framework of Your Orchid Drawing – Stage 9
From the stem, expand a couple of barely separated bent lines. From these, expand three lines that meet at a sharp point. This structures the leaf with its vein.
The most effective method to Draw an Orchid Step – 10
Variety your orchid. Orchids are assorted and come in many tones. The most well-known assortments are pink, white, or purple. However, they may likewise be yellow, red, blue, green, or mixes of these tones.
At the End:
You can now draw or sketch the orchid blossom. It will be a fantastic, quality, tedious action for you. You have gleaned tons of useful knowledge about a marigold bloom in a straightforward and fun manner. We will continue connecting with simple drawings for you as long as you keep drawing our pages. Kindly offer your important input about your thought process for these delightful orchid drawings.
Also, Read Shine Vista.